
Mini Digital Thermometer 2-Pack Hygrometer Indoor Humidity Monitor Temperature Humidity Gauge Meter with Fahrenheit (℉) for
- Mini Digital Hygrometer Thermometer easily knows the current humidity and temperature, Embedded opening.
- Indoor Thermometer Hygrometer Temperature measurement accuracy: ±1℉; Humidity measurement accuracy: ±2%RH.
- Indoor Thermometer Hygrometer Temperature measuring range -58℉-230℉ ; Humidity measuring range 1%-99%RH.
- Reptile Thermometer is 2in1 meter with built-in probe; digital electronic thermometer and hygrometer for.

Digital Reptile Thermometer and Humidity Gauge Remote Probes to Terrarium Reptile Hygrometer Thermo Humidor Tank Cage Incubator
- Monitor temperature and humidity of reptile tanks and terrariums with this easy to use digital thermometer.
- COMPLETE WITH TWO PROBES to Easy to use digital reptile thermometer hygrometer with two external probes.
- WHERE TO USE IT to This accurate digital thermometer hygrometer can be used anywhere temperature and.
- Our carefully sourced range of reptile thermometers and hygrometers are made to the highest standards our.

Weewooday Mini Digital Temperature Humidity Meters Gauge with Probe Gauge LCD Fahrenheit Display Thermometer Hygrometer for
- Package includes: you will receive 6 pieces digital thermometer hygrometers with accurate reading, you can.
- Suitable occasions: the hygrometer thermometer gauge with probe design can provide accurate reading, whcih.
- Measuring range: the digital thermometer hygrometer shows in Fahrenheit, temperature measuring is between.
- Easy to Read and Use: with large LCD display, the digit is easy to read, you can read easily even in the.
A sudden spike in your egg incubator's temperature, even by a few degrees, can quickly damage developing embryos. Sustained temperatures above the ideal 99.5-100.5°F range for chicken eggs lead to abnormal development or embryo death. When the display reads too high, immediate action is necessary to save your hatch. This guide walks you through the most common causes of overheating and provides solutions to get your incubator back to optimal conditions.
Verify the Temperature Reading First
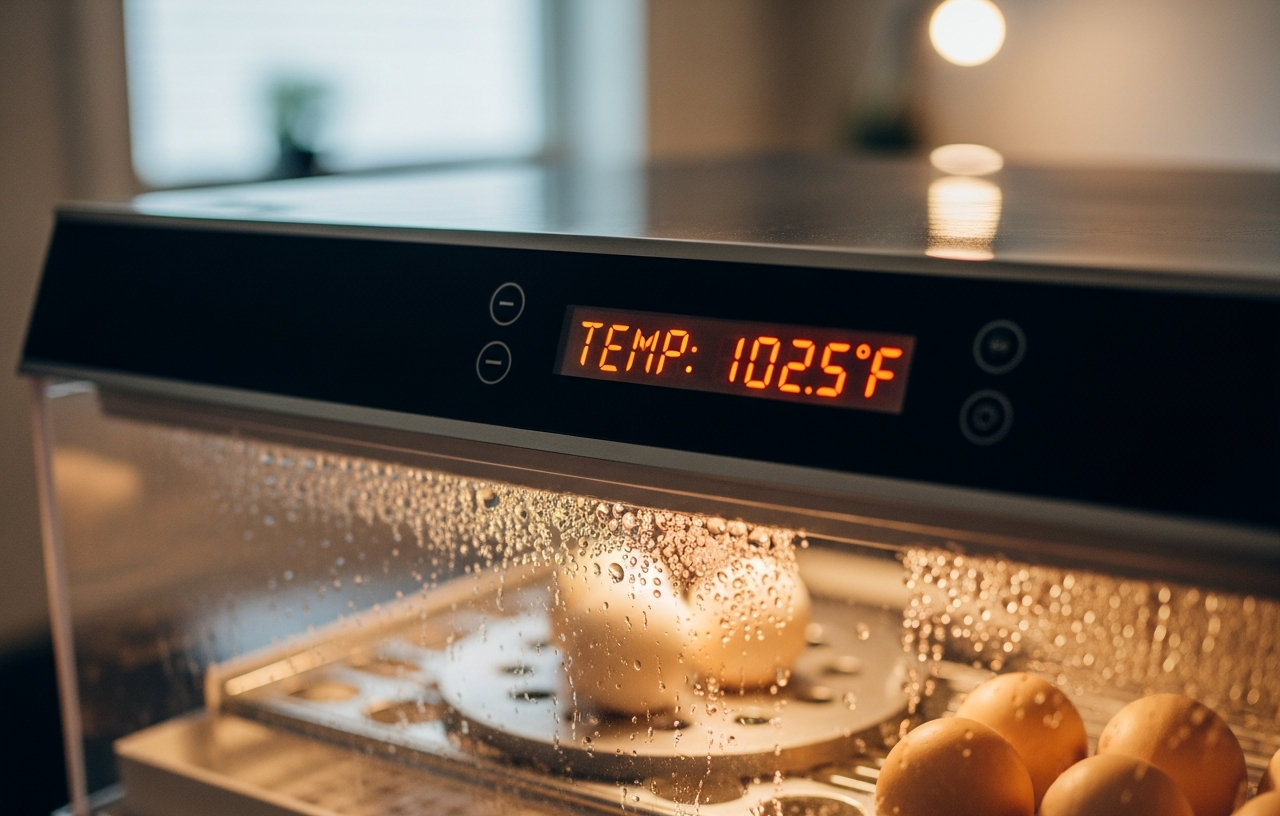
The first step when your egg incubator temperature reads too high is to verify the reading itself. Many incubators come with built-in thermometers that are not perfectly calibrated. An inexpensive, reliable external thermometer and hygrometer can confirm the actual temperature inside. Placing a secondary, calibrated thermometer inside the incubator offers an immediate cross-reference.
Our top pick, a Mini Digital Thermometer 2-Pack Hygrometer Indoor Humidity Monitor Temperature Humidity Gauge Meter with Fahrenheit (℉), provides accurate readings within ±1℉ and also tracks humidity. These small devices are easy to embed or place inside the incubator without disrupting the environment. If your external gauge shows a lower, correct temperature, then the incubator's display is faulty, not the heating system. This is a common and easy fix, often costing under $30 for new external thermometers. Other reliable options include the Digital Reptile Thermometer and Humidity Gauge Remote Probes, which comes with two external probes for versatile placement, or the Weewooday Mini Digital Temperature Humidity Meters Gauge with Probe Gauge LCD Fahrenheit Display Thermometer Hygrometer, available in multi-packs for those running several incubators.
To calibrate your external thermometer, place it in a glass of ice water for five minutes. It should read 32°F (0°C). If it reads differently, note the difference and adjust your readings accordingly. Another method involves placing it next to a known accurate thermometer for comparison.
Incubator Placement and Ambient Room Temperature
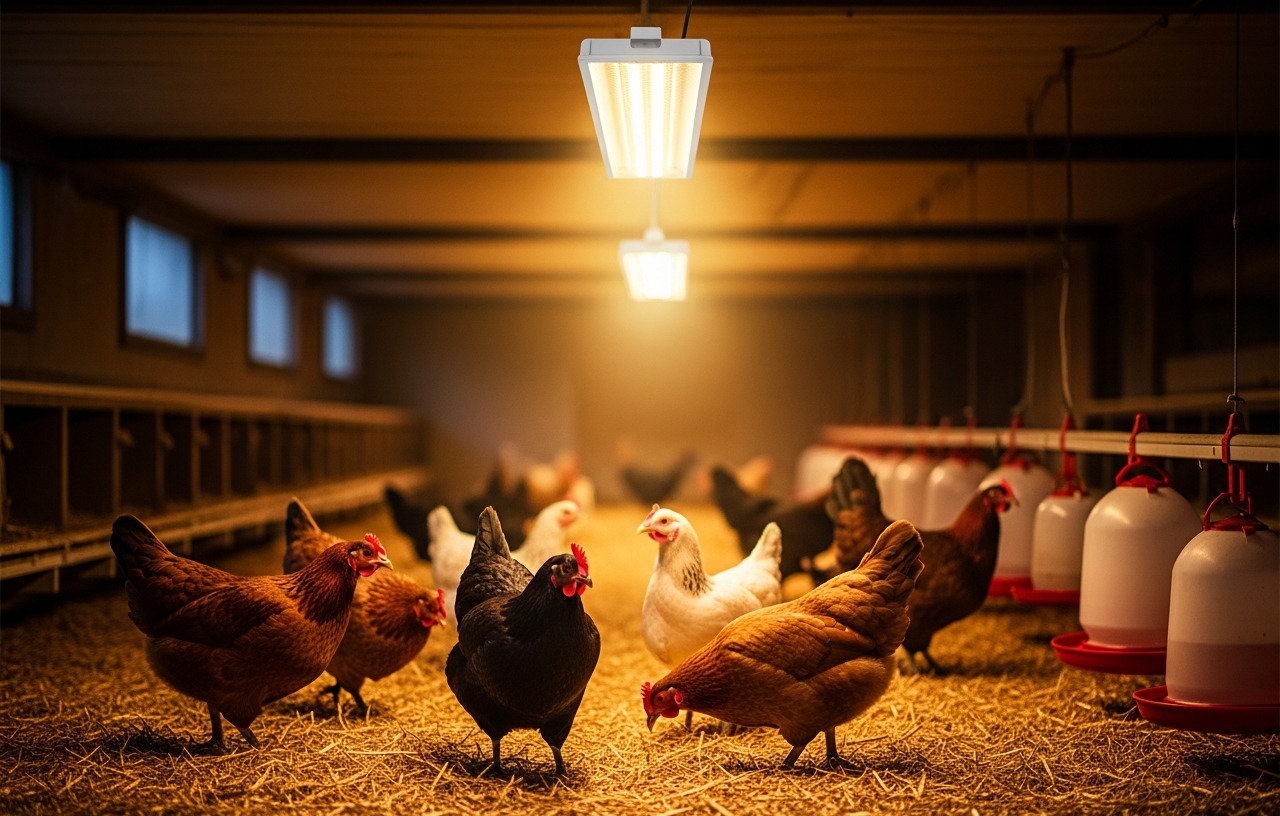
Where you place your incubator significantly impacts its internal temperature stability. Direct sunlight, even through a window, can quickly overheat the unit. Placing it near a heat vent, radiator, or even another appliance that generates heat will have the same effect. Move the incubator to a location with stable room temperature, away from direct light sources and drafts. Ideal room temperature for incubation is typically between 68-75°F. This simple relocation often resolves overheating issues immediately.
While an incubator works to maintain a stable internal temperature, extreme swings in the surrounding room temperature can challenge its capabilities. If your incubation room experiences significant temperature drops or rises throughout the day, the incubator might struggle to compensate, leading to overshoots. Try to maintain a consistent ambient temperature in the room. Using a room heater or air conditioner to stabilize the environment can help. However, avoid placing the incubator directly in the path of these devices, as this can create localized hot or cold spots.
Ventilation Issues and Humidity Control
Proper airflow is essential for temperature regulation and gas exchange within an incubator. Restricted vents prevent warm air from escaping and fresh air from entering, causing the internal temperature to rise. Check all vent openings on your incubator. Make sure they are clear of debris, dust, or any obstructions. Some incubators have adjustable vents. If your incubator's temperature is too high, try opening the vents slightly more. Increased ventilation can also help address situations where the humidity is too high in the incubator, as it allows excess moisture to escape. Adjusting vents requires careful monitoring to avoid drastic changes.
While this article focuses on high temperatures, humidity also plays a critical role in successful incubation. If you notice your egg incubator humidity is too high, especially during the last few days of incubation, it can also harm chick development. High humidity, often indicated by condensation inside the incubator, can lead to 'drownings' or sticky chicks. To lower humidity, reduce the surface area of water in the incubator, or open the vents slightly more. Make sure to do this gradually to avoid sudden drops. Using a hygrometer, like the ones mentioned earlier, is essential for accurate humidity monitoring.
Faulty Thermostat or Heating Element
If the external thermometer confirms a genuine high temperature and placement or ventilation are not the culprits, the problem likely lies with the incubator's internal components. The thermostat is responsible for regulating the heating element. A malfunctioning thermostat might fail to signal the heating element to turn off when the target temperature is reached, causing continuous heating. Similarly, a heating element stuck in the 'on' position will lead to overheating. These internal issues often require parts replacement.
For DIY enthusiasts, replacing a thermostat or heating element can be possible, depending on the incubator model. Parts may cost $20-$80. If you are not comfortable with electrical repairs, calling a small appliance repair technician or contacting the incubator manufacturer is advisable. A service call for diagnosis typically costs $80-$150, plus parts and labor which could add $50-$200 or more. Sometimes, replacing an older, less expensive incubator is more economical than repairing it, especially if it is past its warranty period. You can research best egg incubators for backyard chickens to find a reliable replacement.
Fan Malfunction
Many forced-air incubators use a small fan to circulate warm air evenly. If this fan stops working or is obstructed, hot spots can develop, and overall temperature regulation suffers. Listen for the fan's operation. If it is unusually loud, grinding, or completely silent when it should be running, it might be failing. A faulty fan can cause the heating element to work harder or inconsistently, leading to temperature spikes. Replacing a small fan motor is often a relatively simple repair, with parts costing $15-$40. Consult your incubator's manual for specific instructions on accessing and replacing the fan.
Incubator Age and General Wear
Older incubators, especially those used frequently, can develop issues over time. Seals might degrade, insulation could become less effective, or electronic components might wear out. These factors can contribute to unstable temperatures. Regular maintenance, including cleaning and checking seals, can extend an incubator's life. However, if an older unit consistently struggles with temperature control despite troubleshooting, it might be time to consider a new one. While you can make repairs, the cumulative effect of worn components might make consistent temperature control a persistent challenge.
What to Do Immediately If Temperature is Too High
- Open the Incubator: If the temperature is dangerously high (e.g., above 102°F for chicken eggs), immediately open the incubator lid for a minute or two to release excess heat. Do this sparingly to avoid rapid temperature and humidity drops.
- Relocate: Move the incubator to a cooler, more stable location if external heat sources are suspected.
- Adjust Vents: Open the vents further to increase airflow.
- Check External Thermometer: Confirm the reading with a secondary, calibrated thermometer.
- Power Cycle: For electronic issues, unplug the incubator for a few minutes and then plug it back in. This can sometimes reset a glitching thermostat.
Preventing Overheating in Your Incubator
Preventing temperature spikes is far better than reacting to them. Regular monitoring is the most important step. Always use at least one, preferably two, reliable external thermometers inside your incubator. Calibrate them annually using an ice bath or a known accurate thermometer. Place your incubator in a stable environment. Keep it away from windows, vents, and exterior walls. Maintain a consistent room temperature, ideally between 68-75°F. Clean the incubator thoroughly between hatches, paying attention to vents and fan blades. This proactive approach helps make sure your next hatch is a success. Proper incubator management is a cornerstone of raising baby chicks successfully from day one.
When to Call a Professional or Replace the Incubator
If you have tried all troubleshooting steps and the incubator still cannot maintain a stable temperature, it is time to consider professional help or replacement. Persistent temperature fluctuations, especially significant overheating, can ruin an entire hatch. If the incubator is under warranty, contact the manufacturer first. They may offer repair services or a replacement unit. For older models, weigh the cost of professional repair against the cost of a new, more reliable incubator.
Mini Digital Thermometer 2-Pack Hygrometer Indoor Humidity Monitor Temperature Humidity Gauge Meter with Fahrenheit (℉) for
- Mini Digital Hygrometer Thermometer easily knows the current humidity and temperature, Embedded opening.
- Indoor Thermometer Hygrometer Temperature measurement accuracy: ±1℉; Humidity measurement accuracy: ±2%RH.
- Indoor Thermometer Hygrometer Temperature measuring range -58℉-230℉ ; Humidity measuring range 1%-99%RH.
- Reptile Thermometer is 2in1 meter with built-in probe; digital electronic thermometer and hygrometer for.
Digital Reptile Thermometer and Humidity Gauge Remote Probes to Terrarium Reptile Hygrometer Thermo Humidor Tank Cage Incubator
- Monitor temperature and humidity of reptile tanks and terrariums with this easy to use digital thermometer.
- COMPLETE WITH TWO PROBES to Easy to use digital reptile thermometer hygrometer with two external probes.
- WHERE TO USE IT to This accurate digital thermometer hygrometer can be used anywhere temperature and.
- Our carefully sourced range of reptile thermometers and hygrometers are made to the highest standards our.
Weewooday Mini Digital Temperature Humidity Meters Gauge with Probe Gauge LCD Fahrenheit Display Thermometer Hygrometer for
- Package includes: you will receive 6 pieces digital thermometer hygrometers with accurate reading, you can.
- Suitable occasions: the hygrometer thermometer gauge with probe design can provide accurate reading, whcih.
- Measuring range: the digital thermometer hygrometer shows in Fahrenheit, temperature measuring is between.
- Easy to Read and Use: with large LCD display, the digit is easy to read, you can read easily even in the.