
Inkbird ITC-308 Digital Temperature Controller 2-Stage Outlet Thermostat Heating and Cooling Mode Carboy Homebrew Fermenter
- Supports °C/°F display.
- Able to power refrigeration and heating equipment as conditions change.
- Displays measured temperature and set temperature at the same time.
- High and low temperature alarms are available when the temperature is over or the sensor experiences a.
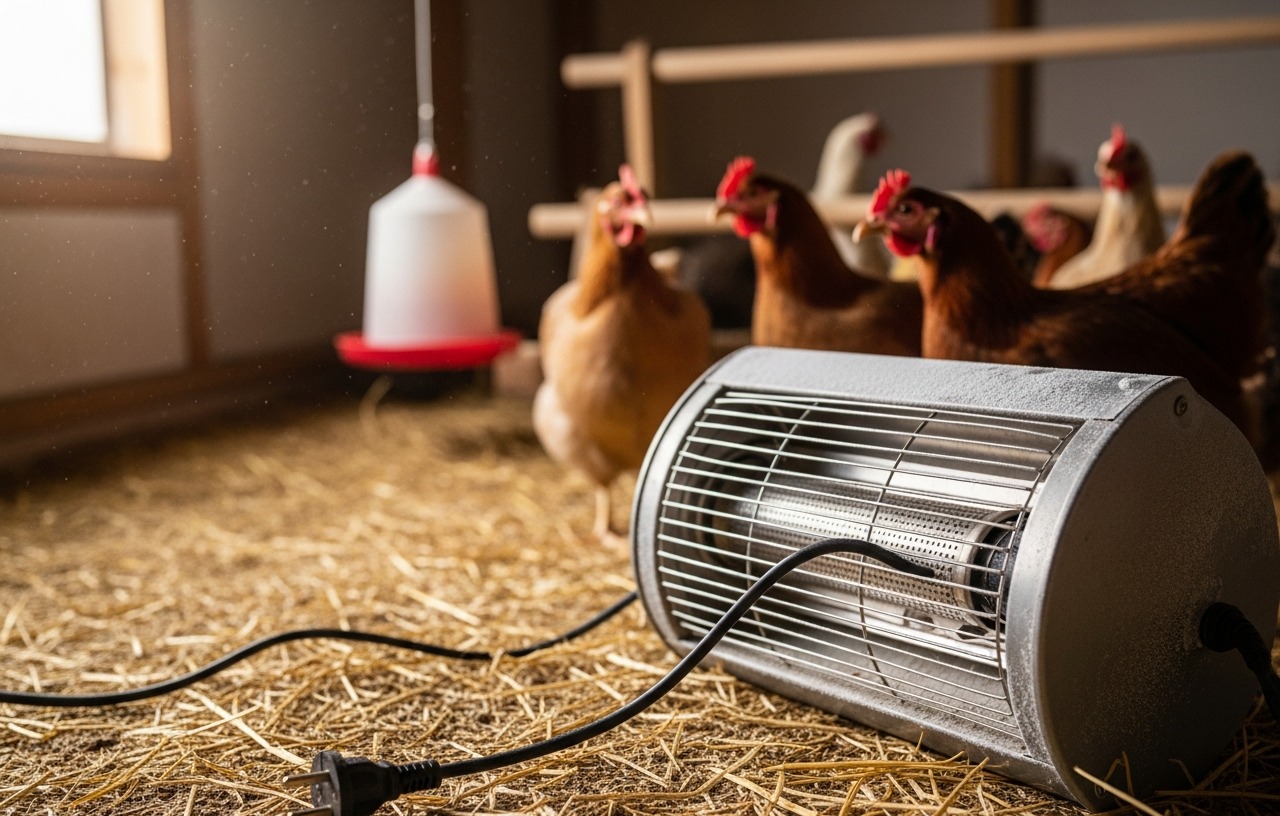
A chicken coop heater that fails on a cold night can put your flock at risk. Chickens are resilient, but extreme cold, especially for young birds or those not acclimated, demands supplemental heat. When your heater goes dark, a systematic approach helps identify the problem quickly. Most issues stem from basic electrical faults or thermostat malfunctions.
Check the Power Supply First
The most frequent reason a chicken coop heater stops working involves its power source. Start here before assuming the heater itself is broken.
Wall Outlet and Plug
Inspect the outlet the heater is plugged into. Make sure the plug is fully seated. Sometimes, vibration or accidental bumps can loosen it. Test the outlet with another small appliance, like a phone charger or a lamp. If the other appliance does not work, the problem is with the outlet, not the heater. A GFCI (Ground-Fault Circuit Interrupter) outlet might have tripped. Press the 'Reset' button on the outlet. If it trips again immediately, there is an electrical fault, and you should not use that outlet.
Circuit Breaker
Heaters draw significant power. An overloaded circuit can trip a breaker, cutting power to the coop. Go to your electrical panel and look for a tripped breaker. It will typically be in the 'off' position or somewhere in between 'on' and 'off'. Flip it fully to 'off' and then firmly back to 'on'. If the breaker trips again, you might have too many devices on that circuit, or there is a short in the heater or its wiring. Consider moving the heater to a dedicated circuit if possible, or unplug other high-draw devices.
Extension Cords and Power Strips
Outdoor environments are tough on electrical equipment. Extension cords and power strips, especially those not rated for outdoor use, can fail. Check for visible damage like cuts, fraying, or burn marks on the cord or strip. Make sure the cord is rated for the heater's wattage. An undersized cord can overheat and melt, or simply not deliver enough power. Always use heavy duty, outdoor-rated extension cords, and keep connections elevated and protected from moisture.
Heater's Internal Fuse
Some smaller, portable chicken coop heaters include an internal fuse for protection against power surges. Consult your heater's manual to see if it has one and how to access it. A blown fuse often indicates a power surge or an internal fault within the heater. Replacing a fuse is usually a simple task, but if it blows again quickly, the heater likely has a more serious internal issue.
Investigate the Thermostat
Many chicken coop heaters rely on a thermostat to regulate temperature. If the thermostat malfunctions, the heater might not turn on, even if it has power.
External Thermostat Settings and Probe
External thermostats offer precise temperature control. If you use one, verify its settings. The 'set' temperature must be below the current coop temperature for the heater to activate. Check if the thermostat is in 'heating' mode, not 'cooling'. The temperature probe's placement is also important. If the probe is in a warm spot, it might report a higher temperature than the rest of the coop, keeping the heater off. Move the probe to an area near your chickens, away from drafts or direct heat sources.
Many chicken keepers rely on a dedicated external controller for their coop heaters. The Inkbird ITC-308 Digital Temperature Controller is a popular choice for this purpose. It supports both Celsius and Fahrenheit displays and can manage both heating and cooling equipment. Its dual display shows both the measured temperature and your set temperature, making monitoring easy. If your heater is connected to an Inkbird or similar controller, check the controller's screen for error messages or unusual readings. Try unplugging the heater from the controller and plugging it directly into a wall outlet (for a short test only) to see if it powers on. This helps determine if the controller or the heater is the problem.
Internal Thermostat Failure
Some heaters have a built-in thermostat. These can fail over time. If your heater has an internal thermostat, and you have ruled out all power supply issues, the internal thermostat might be stuck or faulty. There is usually no user-serviceable part for this. If the heater is under warranty, contact the manufacturer. Otherwise, replacing the heater might be the most practical solution.
Heater Unit Itself
If power and thermostat checks yield no answers, the heater unit itself could be at fault.
Heating Element Failure
The heating element is the component that generates heat. Over time, these can burn out. Signs include a complete lack of heat, or in some cases, a faint glow but no actual warmth. Some elements might show visible damage, like a broken coil. Replacing a heating element is typically not a DIY task for most consumer-grade coop heaters. It often requires specialized parts and electrical knowledge. For most backyard chicken keepers, a failed heating element means purchasing a new heater.
Overheating Protection
Many modern heaters have safety features, including an automatic shut-off if they overheat. This is often triggered by poor airflow, dust buildup, or an internal fault. Some heaters have a small 'reset' button, usually on the back or bottom, that needs to be pressed after the unit cools down. Make sure the heater's vents are not blocked by bedding or debris. Regularly cleaning dust from the heater's exterior can prevent this issue.
Fan Issues (if applicable)
If you use a forced-air or ceramic heater with a fan, a faulty fan can prevent heat distribution. The heating element might be working, but without the fan, the heat does not circulate. Listen for the fan running. If it is silent or making unusual noises, the fan motor might be failing. Like heating element issues, fan repairs are rarely simple for these types of heaters and often mean replacing the unit.
Environmental Factors and Placement
Sometimes the heater works, but the coop remains cold, making it seem like the heater is not working.
Coop Ventilation
While heaters add warmth, proper ventilation is critical for chicken health. Too much ventilation, however, can make a heater struggle to maintain temperature. Drafts can whisk away warm air quickly. Check your coop for gaps or cracks, especially near the floor or around windows and doors. You can learn more about balancing air flow in our guide, Chicken Coop Ventilation: Why It Matters More Than Heat.
Insulation
A poorly insulated coop will lose heat rapidly, forcing a heater to run constantly and still struggle. Adding insulation to walls, ceiling, and even the floor can significantly improve a heater's effectiveness and reduce energy costs. Consider adding straw bales around the exterior in winter for extra thermal mass. Our article on Winterizing Your Chicken Coop: Essential Steps and Top Products offers more ideas for retaining heat.
Heater Placement
Where you place the heater impacts its efficiency. It should be positioned safely, away from flammable materials like bedding, but also where its heat can best reach the birds. Do not place it directly against a wall or in a corner where airflow is restricted. A heater placed too high might only warm the upper air, leaving the chickens cold on the floor. Aim for a height that provides ambient warmth without being a direct heat source they can touch or knock over.
When to Call a Professional
If you have checked all the above, and the problem seems to be an electrical issue beyond a simple breaker trip, or if you suspect internal heater damage, it might be time for a professional. An electrician can diagnose complex wiring problems in your coop's power supply. Service calls for electricians typically range from $80-$150, with hourly rates of $75-$150 on top of that. If the heater itself is faulty, replacing it is often more economical than attempting repairs, given the cost of parts and specialized labor for a small appliance.
Preventative Measures for Heater Longevity
Regular maintenance extends the life of your chicken coop heater. Clean the heater regularly, especially before and after winter storage, to remove dust, cobwebs, and chicken dander that can clog vents and cause overheating. Store the heater in a dry, protected area during warmer months. Always use a heater specifically designed and rated for use in a barn or outdoor environment, ensuring it has appropriate safety features for dusty and potentially damp conditions. Choosing the right size heater for your coop also prevents overworking the unit and ensures adequate warmth. For more information on whether your flock needs supplemental heat, read Do You Really Need a Chicken Coop Heater in Winter?
Ensuring your chicken coop heater functions reliably is essential for your flock's well-being in cold weather. Most issues are simple to diagnose with a logical approach, starting with the power source and moving to the heater itself.
Inkbird ITC-308 Digital Temperature Controller 2-Stage Outlet Thermostat Heating and Cooling Mode Carboy Homebrew Fermenter
- Supports °C/°F display.
- Able to power refrigeration and heating equipment as conditions change.
- Displays measured temperature and set temperature at the same time.
- High and low temperature alarms are available when the temperature is over or the sensor experiences a.


